


Microsoft is retiring Windows 10, and your PC will no longer receive updates after October 14, 2025. Everyone is recommending Windows 11 due to its high security, modern look, and additional features such as multitasking, tab switching, and Snap Layouts. As this operating system is better than the previous one, he required a high-spec system to work smoothly. But what about Millions of users who cannot afford it? Microsoft has announced Extended Security Updates for a period of one year, until October 13, 2026. If you have sufficient RAM, Storage, and a graphics card, but Windows 11 does not officially support your system, here is how you can bypass the requirements check and upgrade your PC from Windows 10 to Windows 11.
In the past few months, Microsoft has blocked many ways of installing Windows 11 on low-end PC’s, but there is always a loophole that bypasses the security verification. I was also using Windows 10, but last week, I first opted in for ESU, and then I upgraded my EliteBook in just a few minutes. Let’s proceed directly to the process without wasting your valuable time.
How to Upgrade Your Unsupported Windows 10 PC to Windows 11
You need to download the official ISO file, mount it on your PC, and run the setup through the command prompt. Here is how to do it:
- Download Windows 11 ISO
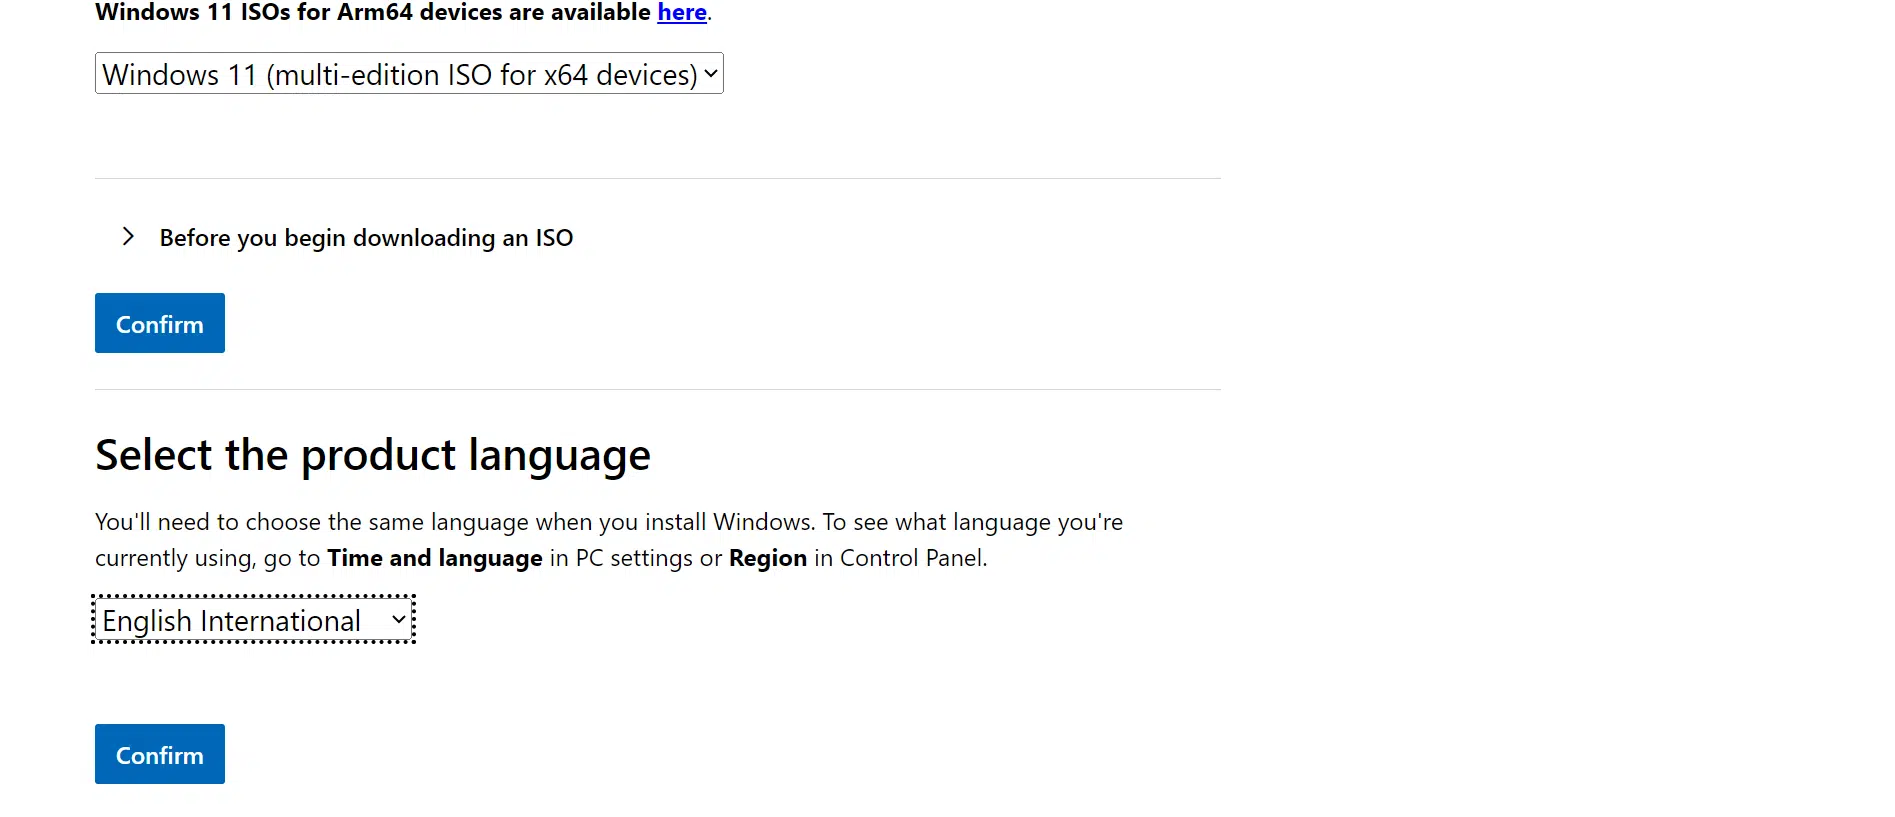
Go to the official Microsoft website, select your Language, and download Windows 11 (multi-edition ISO) for x64 or Arm64 devices (according to your system). The file size is 5.43 GB, so it will take some time, depending on your Internet speed.

- Bypass the Requirements Check
Now, move the ISO file to any local drive other than ‘C’. Then right-click on it and select ‘Mount’. It will display as a CD drive; open it and ensure the setup.exe file is present. After that, type ‘cmd’ in the top address bar and hit enter. A command Prompt will open. Type any one of the commands mentioned below and press Enter.
setup.exe/ product serverorsetup.exe /Product Server/Compat IgnoreWarning /MigrateDrivers All
Now your setup will start.
- Upgrading to Windows 11
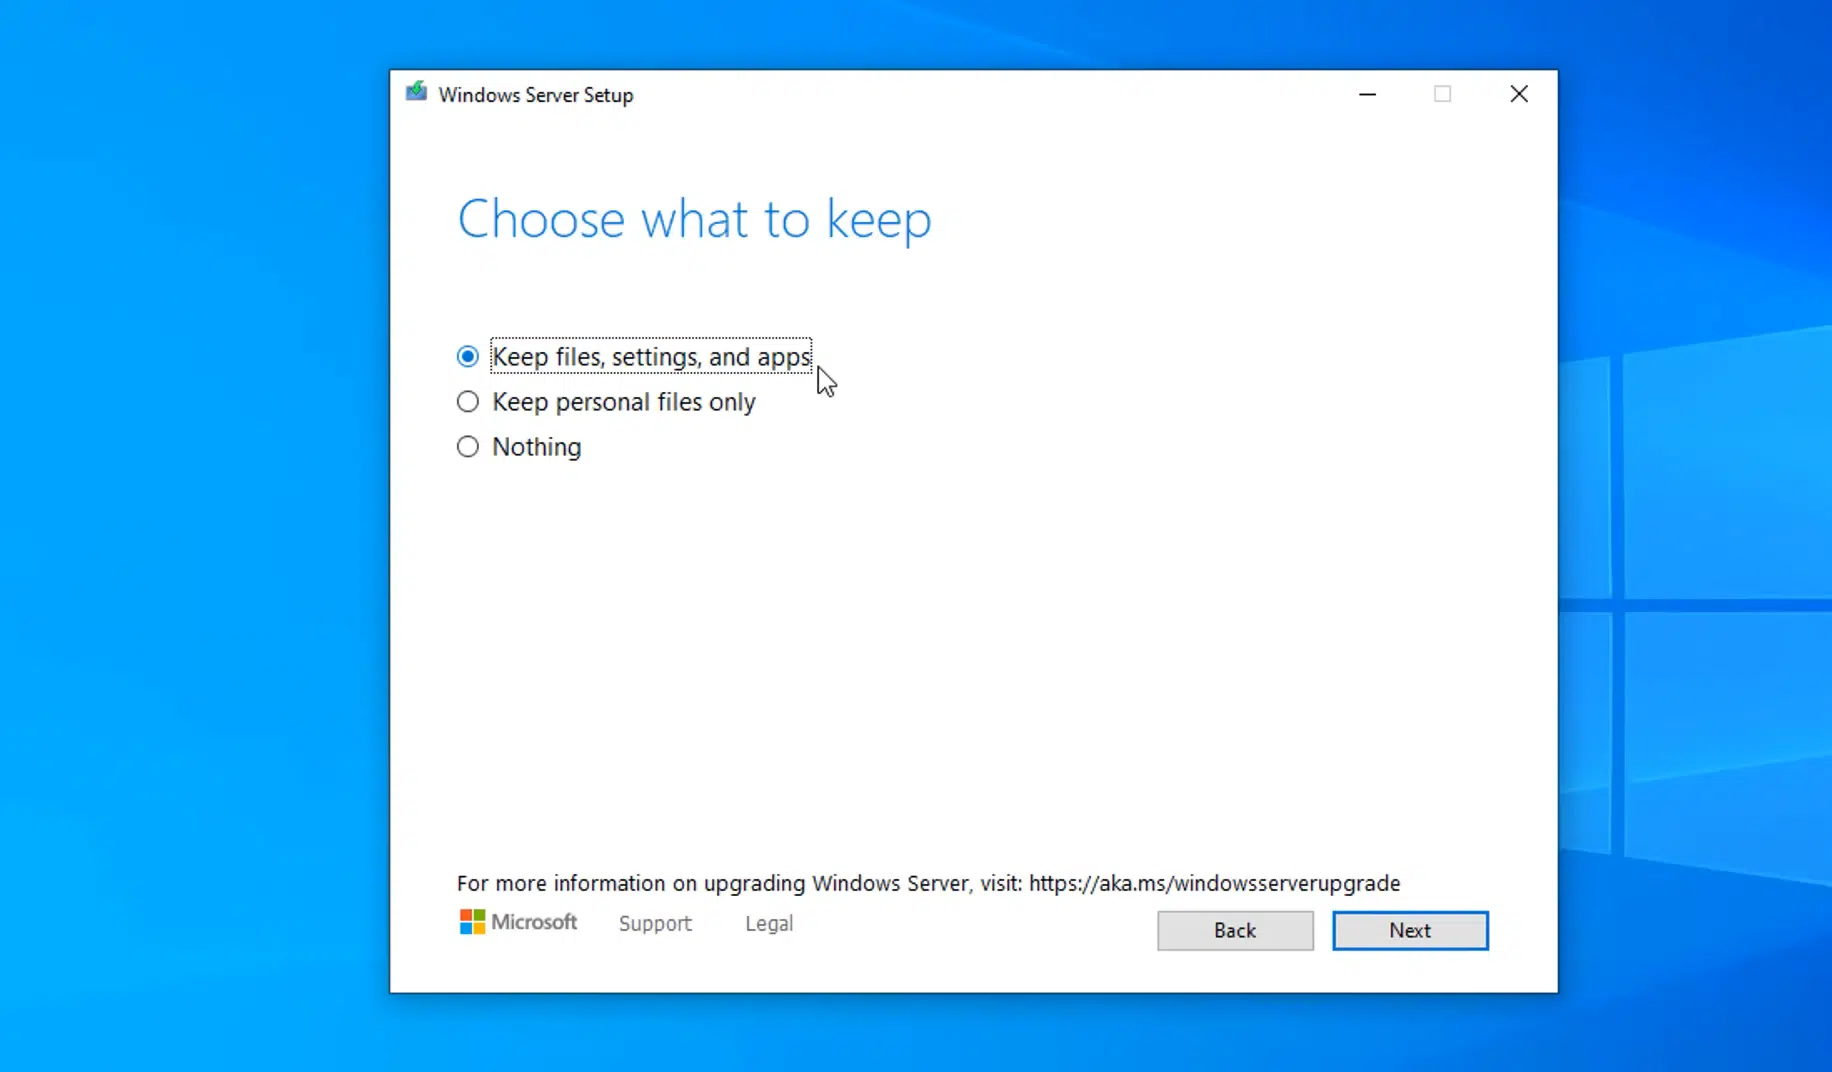
Initially, it will do some checks, then accept the terms and conditions, and choose what to keep from the three options.
1. Keep files, settings and apps
2. Keep personal files only
3. Nothing
After selecting the desired option, click Next and proceed with the installation. Your pc will restart to complete the installation, so do not remove power from your computer/laptop.

Congratulations, now you have Windows 11 installed on unsupported hardware. My laptop previously had Windows 10 Pro installed, and it was then updated to Windows 11 Pro. Therefore, your version may differ from mine. I do not need a new Product key because the previous one is working on this Windows, and I am also getting the 25H2 update via ‘Update and Security’ settings.
Minimum System Requirements (for Official Installation)
- Processor: 1 gigahertz (GHz) or faster with two or more cores on a compatible 64-bit processor or System on a Chip (SoC). Windows 11 requires processors from Intel’s 8th generation or later, AMD Ryzen 2000 series or later, or Qualcomm Snapdragon 850 or later.
- RAM: 4 gigabytes (GB) or greater
- Storage: 64 GB or larger storage device
- System Firmware: UEFI, Secure Boot capable
- TPM: Trusted Platform Module (TPM) version 2.0
- Graphics Card: Compatible with DirectX 12 or later with WDDM 2.0 driver
- Display: High definition (720p) display that is greater than 9″ diagonally, 8 bits per colour channel
Conclusion
The method I mentioned in this article is effective for most users and does not require modifying/adding any files. It is entirely safe to use. I recommend upgrading to Windows 11 only if you believe your system can handle it, as it requires more RAM than previous versions of Windows. If your system is experiencing any unusual errors or encountering a problem, don’t hesitate to get in touch with me, and I will assist you ASAP.
Also Check: Make your USB Drive Bootable for Windows 11 Installation
